Showing posts with label Saving Green at Home. Show all posts

Thursday, February 24, 2011

Saving Money...by making your own Stock!

In the winter I make a LOT of soups (and freeze them).  Which means I use a LOT of chicken & vegetable stock.  The Dollar Store actually sells 32 oz, chicken & beef stock (MSG free) for $1, which I have been very happy with, but this past winter I have started making my own and discovering how NOT only am I saving money--but my homemade stock is SOOOOOO much yummier!  (Even the kids devour it!)  It takes little time and energy and I make it while making another meal so time-wise it is DEFINITELY worth it...

Let's start with chicken stock and then talk about vegetable stock...

I start with either a whole 3lb rotisserie chicken (that I get on sale at Copp's for $5 every couple months).  I also use chicken thighs or any other boned chicken parts that I have bought.

Isn't he cute???
The first meal is always just enjoying straight up baked chicken--mmmm...and I am happy because I didn't do much work (just prepared the sides).

The next night, I pull off the leftover chicken and turn most of it into another dish like chicken pot pie or chicken & spinach lasagna or fajitas--or something like that.  The skin and leftover bones I toss in a pot and add water until it just covers the bones.  I then gently boil the bones for 1 hour or more. 

Leftover chicken on left, boiling bones and skin on right
After an hour or so, I strain out all those yummy juices and have my broth.  At this point you can salt it. If it is bland you can always boil longer or add some chicken bouillon (I have had to do that on one occasion--I guess that chicken just didn't have much flavor :) )  At this point you can freeze it in muffin tins and then place in a Ziploc bag or freeze it in quart jars (don't fill to the top!) until you need to use it--but I like to take it one step further....

okay seriously--this IS as good as it looks!
I like to add chopped up onion and celery and carrots and seasonings of my choice--like thyme, rosemary, parsley, salt, pepper (and even some chicken pieces).  I will then simmer it an additional 30 minutes and then freeze.  This makes and AWESOME chicken soup base!  When the kids want chicken noodle soup, I will pull it out of the freezer, warm it up on the stove and add some egg noodles! YUM! 

And if you kept track--yes, I got 3+ meals out of one $5 rotisserie chicken.  And if I use chicken thighs, it will be 3+ meals out of about $3 of chicken (buy on sale $0.98/lb or less--I like to stock up at $0.68/lb.)

Now onto vegetable stock...This is too sweet....who would have thought you could make stock from all those vegetable scraps that you compost or toss (AND you can still compost after making your stock...) Check it out!

Think about all those parts of the vegetables that you normally toss--ends of cucumbers, onion skins, pepper seeds & stems.  Start saving all those parts instead of tossing them out.  Put them in a Ziploc bag and store in the freezer until you have 2 bags--then make your own vegetable stock.  Check out this link to give you all the details.  (I have been warned not to save cabbage, zucchini and broccoli parts as that can make your stock bitter.)  Feel free to experiment by adding your own herbs as well!

http://www.ehow.com/how_4767967_vegetable-broth.html

Saving Money... by joining a CSA!

Before you say--"WHAT?!  How does joining a Co-op save me money??"  Let me explain...

Did you know that most Health Insurance Plans will reimburse you up to $200 a year for "Healthy Lifestyle Living?"   Some of these "Healthy Lifestyle Living" items include gym membership (though many have a requirement that you must go certain amount of times a month to get reimbursed), exercise and health classes, and joining an organic co-op.

Two years ago, Rob and I decided to try it out.  We joined a co-op for about $240.  For 18-20 weeks, we then received a 1/2 share of produce every week.  And this half share was more than enough for the four of us! (Note:  We have 2 small children--but we are SERIOUS veggie eaters!) AND most of my garden produce was then able to be frozen for us to eat in the winter.  To make this deal even sweeter--our health insurance reimbursed us $200.  That means we only spent $40 for 18-20 weeks of produce!  AMAZING!  (Just a warning--prices for co-ops have gone up since then and are closer to $300 for 1/2 share, but we still feel that with the amount of produce we receive and the reimbursement--it is WELL worth the cost.  There are also other options if you would like a reduced price/free--such as volunteering to work at the farm in exchange for your share.

Since then, every year we have become members of a local co-op which delivers the produce to my husband's work (it is one of the pick-up sites), weekly.  We are always excited to see what we get and we LOVE knowing our food is organic AND we are supporting local farmers AND we are spending WAY less than if I purchased the produce at the grocery store AND my garden veggies can be saved for the winter.  (Check out all those PROS!)

So put a call into your health insurance and see if they will offer you a reimbursement for your food!  And then check out the CSA's in your area.  (You will want to do this soon--as many co-ops are already filling up for this coming summer!)

Here is a link to the CSA that we use and LOVE
http://www.wholesomeharvestcsa.com/

and here is a listing of CSA's in the Madison area.  Check it out!
http://www.reapfoodgroup.org/atlas/farms/csa.htm

Tuesday, December 21, 2010

Last Minute Christmas Gifts (or gifts to keep in mind for next year!)

Mint Tea I have made in the past
This blog is for the “last minute, I don’t know what to buy them”, Christmas shoppers.


We all have family members that really don’t need anything. Or how about those people that you want to give a gift to but you don’t know what they would like. For those people, I like to put together some homemade EDIBLE gifts. (Everybody likes to eat, right??) Here are a few things I have done over the years.

Every year, we make baskets of goodies for loved ones. I pick up the baskets throughout the year at garage sales or thrift stores. This year, I scored big and purchased 10 VERY nice baskets for $1 at the Salvation Army. Usually, baskets run me about $0.25 - $0.50 each. In lieu of baskets, I have also used various decorative tins that I have found in garage sales as well as Christmas bags which I have picked up on clearance after the holidays.

In these baskets we place tissue paper and then stuff them with goodies. These goodies usually include bags of various cookies we have baked, homemade bread, and jams or jellies I have preserved for the year. (On the jars, I will write—“For more Jam next year, please return the jar and screw band.” ) I will often receive them back, and for those I don’t, it isn’t a big deal since I usually pick up 12 – 24 jars every year in a garage sale for cheap. But as always I like to encourage reuse of items so they don’t get tossed.

Homemade Jelly

Other things we have put in the baskets have included herbs, dry soups and cookie mixes, and hand sewn napkins, stockings, aprons, etc...

I know this blog is pretty late for this year, but here are some great ideas to keep in mind for next year.

Herbs-I grow my own herbs in the summer. In the fall, I will cut them and hang them to dry for 1 – 2 weeks. I then cut off the leaves and split the herbs between baby food jars (that I have saved or other people have saved for me) and decorate.

Herbs in decorated baby food jars

Dry Soup mixes- Check out these recipes to make your own dried soup mixes. Simply place in a quart canning jar, tape on directions, and VOILA you have created an instant dinner for someone you love. (You could also make your own biscuit mix to accompany the soup mix.) Here are some recipes.

Calico Bean Soup

http://allrecipes.com/Recipe/Calico-Bean-Soup/Detail.aspx

Chicken Rice Soup

http://allrecipes.com/Recipe/Chicken-Rice-Soup-Mix/Detail.aspx

Country Soup in a Jar

http://allrecipes.com/Recipe/Country-Soup-in-a-Jar/Detail.aspx


Love Soup

http://allrecipes.com/Recipe/Love-Soup-Mix-in-a-Jar/Detail.aspx


And here is a webpage with a TON more!

http://www.recipegoldmine.com/foodgiftsoup/giftsoup.html


Biscuit Mix-This is similar to Bisquick. You simply add milk and bake! (Add some of your favorite Bisquick recipes to the outside of the jar.)

http://allrecipes.com//Recipe/biscuit-baking-mix/Detail.aspx


Cookie Mixes—These you make the same as soup mixes. Layer the ingredients in the jar to make it “pretty” and tape the instructions on the outside.

The possibilities here are endless—Take a look!

http://www.razzledazzlerecipes.com/christmas/gifts/cookie-mixes.htm

What kind of home-made gifts do you like to give?

Saturday, November 20, 2010

Saving Money....on Portraits

I know you have the MOST BEAUTIFUL CHILD(REN) and of course you want to capture those milestone pictures.  You want a beautiful picture to show your child at each age...and yes we are talking the typical 3,6,9,12,18 month and then yearly and of course family and Christmas portraits AND you want enough to share with family and close friends.  Not to mention they make WONDERFUL (& inexpensive) Christmas/birthday presents to those parent/grandparents/aunts/uncles who have everything.

Before you take your child in for their pictures, realize that you do own a digital camera and you are probably already taking MANY pictures of your children (and if you don't own one, I suggest purchasing one and then keeping it readily available to capture all of those beautiful candids.)  I keep mine hanging on our coat rack on the hallway.  And yes, I am ALWAYS grabbing it.  You probably already have quite a few incredible pictures of your child that you could choose to print as your own collection via printer or take it to a store (via person or email) and have your own collection printed.  Walmart has a standard collection starting at $5 (1 8x10, 2 5x7, and 16 wallets).  Walgreen's also has an Ultimate Family Package currently priced at $9.99 ( 20 4x6, 3 5x7, 3 8x10, 20 Wallets). 

However if you are like me, you probably like to get that good up-close portrait at each milestone taken professionally.  Here are my favorite places to go and how I save.

First of all, before I go I remind myself that I am here for 1 good photo.  I don't need 4 different poses.  Afterall--where am I going to put up all these pictures AND where will they go after I get the next milestone picture done.  There is only so much wall space, and I don't want to pay a fortune for pictures I may only have up on my wall for a few months.  If I have one child, I go to JC Penney.  The staff tend to be VERY good.  They listen to what I want (I don't want props--I want that ONE good picture), and they take their time with me knowing I will not be buying much--they know me well enough now.)  There are MANY coupons out their for JC Penney to get 1 free sitting and then a portrait package (2 8x10, 4 5x7, 4 3x5, 6 wallets for $7.99).  http://www.jcpportraits.com/

Here is a link to their coupons (I will warn you that they change the coupon close to Christmas to be a little more because of the rush.  However, if you look in any parenting magazines from months prior to Christmas you will find the $7.99 deal--this has been consistant for over 4 years now.)  http://www.jcpportraits.com/content/coupons/coupons-print.htm

If you are in LOVE with various poses, you can use the $3.99/sheet coupon in lieu of the $7.99 one.

So do I pay $7.99 for my pictures---No, I pay $4.99!  After each photo session, I am sent, via email, a link to complete a survey.  It takes less than 5 minutes to complete.  I do it immediately when it is sent and print it out.  The coupon is for $3 off your next photo session.  I then save it for our next session.

So what do you do if you FALL in love with another picture or they have made this INCREDIBLE collage.  Well--I always allow myself to splurge from time to time.  I have 2 wonderful collages of Ky & Alaina in my living room.  Each cost an additional $15, but they were worth it.  Sometimes they have another pose I fall in love with and will allow myself to buy it--anywhere from $8 - $12.  But before I buy I always remind myself of my goal.  And I remind myself that I have WONDERFUL pictures that I have taken at home. 

Family & Christmas portraits

JC Penney only gives you 1 free sitting fee with their coupon.  I don't like to pay sitting fees, so I avoid it at all costs (and honestly I think memberships are a waste).  Once a year I try to get the family's picture done as well as a Christmas picture with just the kids together.  For this I go to Portrait Innovations.  http://www.portraitinnovations.com/

They have a pretty good $9.99 package deal with no sitting fees (One - 10 x 13, Four - 3 x 5s, Two - 8 x 10s, Four - 5x7s, And 32 Wallets, for Christmas then add an additional 9 Greeting cards).

Once again, when I am there, I remind myself that I am there for one portrait.  I have lots of pictures at home--I don't need more.  I honestly have never bought more than one pose from them--their prices were just WAY too expensive.  Which makes it easier to leave and you walk out with your pictures in 15 minutes (after choosing your pose). 

So what if you don't have enough pictures for everyone.  Well, you could choose to make your own package through the Walmart deal($5) or you could choose to go back for another sitting (I have done this once before, but due to time prefer not to.)  Or, you could wait until you pick up your photos at JC Penney--they always try to get you to buy more before you leave.  Often they are discounted $5 - $8 a sheet of varying sizes.  Usually my option is the Walmart option.   It's a bit cheaper and I get lots more. 

Where do you like to go for portraits?  And how do you save money?

Wednesday, November 10, 2010

Saving Money...by having one meatless dinner a week

I cook dinner about 3 times a week.  The other nights we eat leftovers (which are sometimes reinvented) and often we will have one pizza night.

The most expensive item at the store is meat.  You usually spend a minimum of $2/lb for your meat and this becomes the basis for your meal.  By skipping the meat in one meal a week, you will find yourself saving money and creating new delicious dinner alternatives.

Last week I made Baked Ziti without meat (see above pic).  In fact I made 2 pans--one for myself and one for a friend.  One pan for my family lasted 2 dinners and 1 lunch (3 family meals.)  The total cost for making two pans for Baked Ziti--around $1.75.   If I had added meat, the cost would have been closer to $4.75.  The difference really is astounding.

Here are some ideas to make a yummy "no meat" meal.

Tacos or taco salad with black beans or chick peas
Pasta without meat
Breakfast meals make FUN dinners--we usually have pancakes on Sunday night and then the leftovers make yummy breakfasts for the week.
Egg Mcmuffins--if you don't have english muffins, use biscuits or rolls
Egg bakes (put assorted veggies in  and top with cheese)
Grilled Cheese
Grilled peanut butter and jelly (this is MUCH yummier than it sounds)
Quesadillas (take 2 tortillas and put cheese, beans, salsa, guacomole--whatever you like in between and bake either in the oven or microwave)
Nachos--(top tortilla chips with beans, cheese and your choice of toppings.  Heat in oven until melty)
Potato soup (so many kinds!)
Baked potato--have assorted toppings including beans, cheese, salsa, sour cream....
Chili without meat
Vegetable soups of all kinds including squash soup and bean soups
Macaroni & Cheese
and yes there are MANY more! 

So try it out and see what you save...
What is your favorite vegetarian dish?

Tuesday, November 2, 2010

Don't Toss That PUMPKIN!

*Today I went to HyVee to vote and all their pumpkins and gourds in front of their store are free!  (You don't even have to go in the store--just drive up and grab some!)  I grabbed 3 big pumpkins for pumpkin butter and 3 medium sized sugar pumpkins for pumpkin pie and 8 little pumpkins to stuff as side dishes!*

Halloween is over--that means pumpkins are going on clearance (last year Aldi's had pumpkins on clearance for $1 each after Halloween) and perhaps you have some non-carved pumpkins sitting out as decoration.  Here is what you do to make pumpkin puree and pumpkin seeds (along with some of my favorite pumpkin recipes).  And yes this is quick and easy (and money saving!)  Just think of those yummy homemade pumpkin pies you can make for Thanksgiving!

To puree your pumpkin, first wash the outside of your pumpkin.  Then preheat your oven to 350 degrees.  Cut your pumpkin in half and pull out the large seeds. 

Put them in a bowl of water and set aside. 

Then scoop the strings out with a metal spoon (so much easier to do when your pumpkin is cut in half!)  Cut your pumpkin into 2 - 4 pieces (depending on the size of your pumpkin.)  Place flesh down in a 13 x 9 pan with 1/2 inch of water.  Place in your oven. 

Grab your seeds out of the water and remove what pumpkin strings are left and place them on a towel to dry.  I usually leave them overnight. (You can also dry them in the oven.)

Cook the pumpkin for about 2 hours.  I usually wait until the top of the pumpkin skins start to blister (this makes it really easy to remove the skin.)  Here is what it should look like when you pull it out. (Notice the wrinkles in the skin.)

At this point I usually put the pumpkin in the fridge to cool overnight as well as absorb the water in the pan (makes it easier for pureeing). After your pumpkin has cooled the skin should easily pull off (if it doesn't, just remember to cook a little longer next time so the skin blisters--this time you will probably just need to scoop the flesh out.

In a bowl, mash your pumpkin.  Ta-da!  You now have pumpkin puree that is fresh and YUMMY! 

You can freeze the puree for up to a year.  I store mine in 16 oz containers (about 2 cups should fit)--similar to the amount a can of puree would have.  Be sure to label your containers!  (If you want chunked pumpkin--for example the pumpkin black bean bake recipe calls for chunked pumpkin, simply cook for 1 hour and then cut into cubes.  You can also freeze your pumpkin cubes in a container or freezer ziploc bag.)


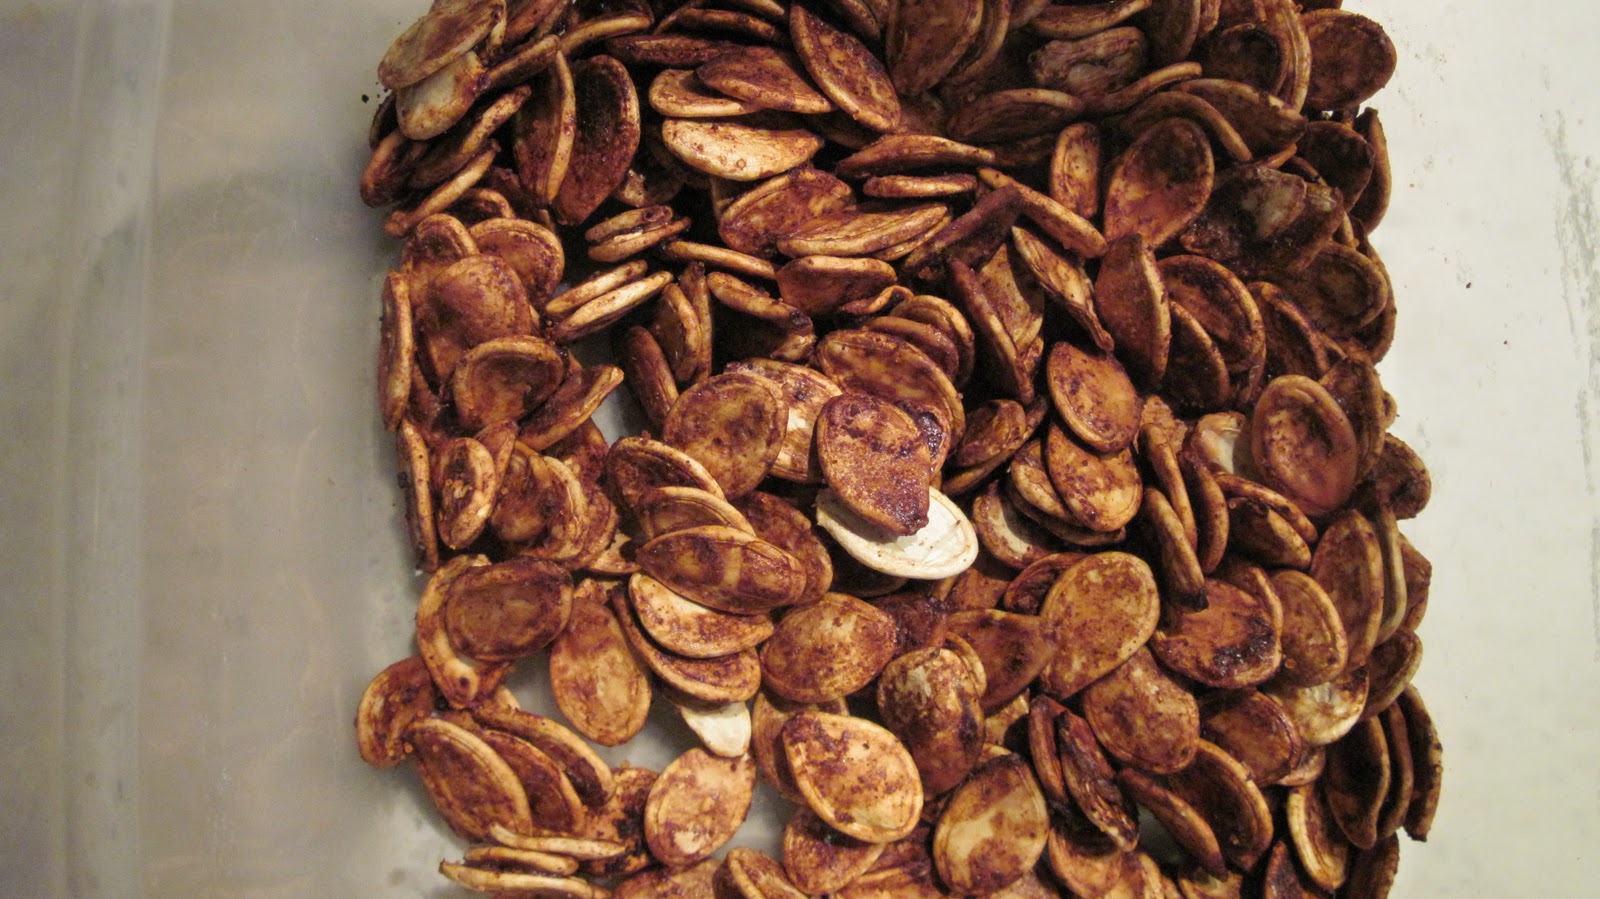
Now for those seeds--you can bake them in the oven and simply salt them--or here is one of my favorite pumpkin seed recipes!

http://allrecipes.com/Recipe/Spiced-Pumpkin-Seeds/Detail.aspx


As promised my FAVORITE pumpkin recipes--and yes I have many because I love sneaking squash into anything I can--an added vegetable to the kids diet!  If you have some pumpkin recipes you would like to share, please comment on this blog so I can post for others!  Thanks!

Peanut Butter Pumpkin Bread

I was given this recipe from a friend. YUMMY!

3 C. Sugar
1 (15oz can of pureed pumpkin) --about 2 cups
4 eggs
1C. Veg. Oil
3/4 C water
2/3 C. Peanut butter
3 1/2 C flour
2 tsp baking soda
1 1/2 tsp salt
1 tsp cinnamon
1 tsp ground nutmeg

Combine sugar, pumpkin, eggs, oil, water, and peanut butter; beat well. Combine flour, baking soda, salt, cinnamon, and nutmeg; mix well. Pour in 2 ungreased 9inx5x3 loaf pans. Bake 350 for 60-70 min or until tooth pick center comes out clean.


Pumpkin Bread

(From Aunt Sally)

This pumpkin bread is very easy and everyone in our family loves it. Sometime I put chocolate chips in it – or dried cranberries. It’s a must at Thanksgiving and Christmas! Lisa likes to spread butter on it – I prefer whipped cream cheese – or just plain is also very good!

3 cups all-purpose flour
2 cups sugar
2 tsp. baking soda
1 tsp. ground cloves
1 tsp. ground cinnamon
1 tsp. ground nutmeg
1 tsp. salt
½ tsp. double-acting baking powder
1 – 16 oz. can pumpkin (2 cups)
2/3 cup salad oil
3 eggs, slightly beaten

Preheat oven to 350 degrees. Grease well two 9” x 5” loaf pans. In large bowl with fork, mix flour with next 7 ingredients; add remaining ingredients and mix just until blended. Turn batter into pans. Bake about 1 hour or until toothpick inserted in center comes out clean. Cool in pans on wire racks 10 minutes; remove from pans and cool completely. Makes 2 loaves.

Pumpkin Pancakes

These are especially good on those cold fall/winter mornings.

http://allrecipes.com/Recipe/Pumpkin-Pancakes/Detail.aspx


Pumpkin Black Bean Bake


This is great for the fall!

1 lb ground beef
2 cups cubed pumpkin pieces
1 coarsely chopped medium onion
1 15 oz can black beans--rinsed
1 cup corn
1/2 tsp salt
1/2 cup beef broth
3 oz cream cheese
1 8.5 oz package of corn bread mix
1 egg lightly beaten
1/3 cup milk
1/3 cup pureed pumpkin

Preheat oven to 400 F. Cook ground beef, pumpkin, and onion over medium heat until browned. Drain juices. Stir in black beans, corn and salt. Heat through. Stir in broth and cream cheese until blended. Transfer into 9 x 13 baking dish. In medium bowl stir corn bread mix, egg, milk, and pureed pumpkin until just combined. Spoon over beef mixture. Bake 20 minutes or until toothpick comes out clean.

Soft Chocolate Chip Pumpkin Cookies


These are almost too soft to be a cookie...but what a great way to get some extra vegetables into your kids.

1 cup pureed pumpkin
1 cup white sugar
1/2 cup vegetable oil
1 egg
2 cups all-purpose flour
2 teaspoons baking powder
2 teaspoons ground cinnamon
1/2 teaspoon salt
1 teaspoon baking soda
1 teaspoon milk
1 tablespoon vanilla extract
2 cups semisweet chocolate chips
1/2 cup chopped walnuts (optional)

Combine pumpkin, sugar, vegetable oil, and egg. In a separate bowl, stir together flour, baking powder, ground cinnamon, and salt. Dissolve the baking soda with the milk and stir in. Add flour mixture to pumpkin mixture and mix well. Add vanilla, chocolate chips and nuts.3. Drop by spoonful on greased cookie sheet and bake at 350 degrees F (175 degrees C) for approximately 10 minutes or until lightly brown and firm.

Pumpkin Casserole


This is YUMMY! I compare this to sweet potato casserole. A great side dish for Thanksgiving!

http://allrecipes.com/Recipe/Pumpkin-Casserole/Detail.aspx


Pumpkin Butter

I honestly haven't tried this recipe--but since I picked up 3 FREE pumpkins at Hyvee today, I am going to can some pumpkin butter (you can also freeze it--and it makes a great gift--think Christmas!).  Check it out!

http://allrecipes.com/Recipe/Pumpkin-Butter/Detail.aspx

Monday, October 18, 2010

Being Green with keeping your house warm!

I am excited to tell you it is October 17th and I have YET to turn on my heat--and yes we have crappy windows and such that let in ALL the outside air!  Here are a few tips and tricks I have learned to help keep the house warm without turning on the heat.

*Open window coverings on your southern facing windows. The sun will naturally heat your home during the day. 

*Look into insulating curtains for at night.  I actually made some of my own for around $10 a window.  They pull up like roman shades and I put additional molding on the sides of my window with hinges to "clamp" the curtains down on the side when the window is closed.  I attached the curtains with velcro to the top of the window which helps eliminate air leaks at the top. (If you want more info on these let me know otherwise here is additional info below.

Here is info on how to make sure the curtain is insulating: http://www.brighthub.com/environment/green-living/articles/21685.aspx

And here is info on how to make an insulated curtain.  (If you buy the insulating fabric at JoAnne's they have instructions included.)  http://www.ehow.com/how_4479972_make-insulated-curtains.html

*Close drapes at night--they insulate a little so they will help keep some of that cool air out. 

*If you have a sunporch area or room with many windows that heats up from the sun, make sure that hot air has access to the house.  You may want to use a box fan to blow the warm air into your home. 

*If it is warmer outside then inside--open those windows!  However, once the temp on the outside becomes cooler--CLOSE THEM.  We have been lucky with some upper 70's days here and there.  I have really taken advantage of these days to warm my house.

*Cook/Bake.  Yes I am serious.  I have been doing a fair amount of cooking and baking the last month to help keep the house warm.  I will often bake/cook double batches.  Then I can freeze for later or share with a friend now.  After I turn the oven off, I will open it up to let the heat warm the house  (of course I am careful to make sure that my little ones are in another room and don't come near the stove.

Of course there are the standard things you can do as well---buy insulation tape for around windows and doors.  I like waiting for a windy day and then I take a candle around any spots that may leak air from the outside.  If the flame dances, I know that I have a leak and then use insulation foam/tape/rubber to block the leak. 

If you have drafts coming from under your door, you may need to buy a new door sweep--these are relatively inexpensive and slide easily on the bottom of your door.  Definitely worth the investment.

So what do you do to help keep your house warm?

Sunday, October 17, 2010

Being Green with your heating bill- installing a programmable thermostat and scheduling it to SAVE you money!

When Rob and I purchased both of our houses the first thing we did was to install a programmable thermostat.

It just made sense.  We could save money by turning the heat down when we were gone and when we were sleeping (and we didn't have to REMEMBER to turn down the heat!)  With winter coming this is one of the smartest way to reduce your heating bill.  Energy Star estimates people save $180 a year with a programmable thermostat.  I am pretty sure we save more than that at my home--and I am a stay-at-home mom.  Below I give you some info on purchasing and installing your thermostat and then scheduling it to SAVE you money!

Currently you can buy a programmable thermostat for as cheap as $17 at Menards.  If you want one that you can schedule weekends differently than weekdays it is as cheap as $24.  And don't forget that you can put this purchase down as a tax deduction under the Energy Star Credit Act (you will get 30% back.)

These thermostats are surprisingly easy to install.  I have personally installed 2 myself.  They come with easy instructions.  It is a matter of placing a battery in them, turning off the circuit breaker that leads to the thermostat and then connecting a few wires (and of course turning the circuit breaker back on.)  Don't let installation scare you from making this wise purchase.  It can be done in under an hour.  Last time I did it, it took me 20 minutes.

Here is how we program our thermostat to save us money.  At night we reduce the heat to 65 degrees.  I make sure to put my daughter in 2 layers since she is not old enough to keep blankets on her.  I then have the heat lower to 60 degrees around 7 AM. 

We often get up at 7 and head out of the house for errands, storytime, workout, etc....  Your house will not instantly cool to 60 degrees so don't panic at this cold temp.  The 60 degree mark just tells your furnace when it needs to turn on. Your house will slowly cool down.  In fact, usually I am home by noon and the house (in the winter) may be around 63 degrees.  I will then override the thermostat and turn it up to 68.  When you come home and feel that your house is chilly--it will remind you to do this.  You can ALWAYS manually override your set temperature--and it will stay overridden until it is scheduled to change.  (So if you head out again, you will want to remember to turn it down again if you don't have that scheduled.) 

This is why I set my temperature so low.  If I am staying in the house for the morning, the house getting colder will remind me that I need to raise the temperature.   It takes seconds to override the thermostat and turn the temperature up.  I like to err on the side of saving money (if I leave) vs. simply overriding the temperature if I am staying in the house.

You can put more settings in your thermostat if you know that you will be in and out several times, but since my schedule tends to vary I just have the same two settings for night and day.  I love coming home after being gone all day and realizing that my heat was not on--I did not pay to heat an empty house.  Of course you will have the first 10 - 20 chilly moments of being in a 60 degree house, but most houses like ours have an efficient heating system that will heat the house back up pretty quickly.  Honestly, when we are coming from 10 degrees outside, I really don't notice a 60 degree house being THAT cold.  (After all it is much warmer than outside!)

If you are going to be gone several days, you can change your thermostat to manual vs. programmed.  This means you can set it for one temperatures while you are gone.  We will often set our house around 55 degrees if we are going to be gone several days.  Remember you don't want your house to get too cold--because your pipes could freeze--many kitchen sinks are located on an outside wall meaning the pipes there get colder than the rest of your house.

So buy your thermostat, install it, and figure out what temperatures and schedule works for you.  Start watching those heating bills FALL!  You will be amazed by the savings!

Tuesday, October 12, 2010

Shopping Aldi's

If you haven't shopped Aldi's before, this post may make you panic.  You probably have heard the rumors that this is the "poor people" store and they have horrible food, but I am going to challenge you to give them a chance.  Did you know that the corporation that owns Aldi's also owns Trader Joe's?  In fact, you will find some of the same products at both stores (sometimes labeled differently though.) In this blog post, I am going to tell you "how to shop" Aldi's and what to expect as well as give you a rundown on prices of some of their food--items that I specifically stock up on at their store because I know I won't be able to find it for less elsewhere. (If you are familiar with Aldi's skip down to the list below to see what my "buys" at Aldi's are.)

When you arrive at Aldi's be sure to bring a quarter, cash (or a debit card) and bags for your groceries.  Aldi's uses a "quarter" system for your cart.  You deposit the quarter into the cart to unlock it, do your shopping, return the cart, and get your quarter back.  They escape the extra costs of cart corralers by doing this quarter system (and pass the savings to you).  Honestly, I wish other stores would do it.  You never see a random cart in the parking lot of Aldi's.  People always return them because they want their quarter back. 

They also do not have baggers.  Therefore, they will ring them up and return them to the cart.  You bag your own groceries on a counter provided.  (Another way to pass savings to you!)  If you do not bring your own bag, you can use boxes found throughout the store, or purchase a bag.  I think they cost $0.25 each.

Aldi's only accepts cash or debit cards.  This is another way they keep their prices down.  They don't have to pay fees to the credit card companies and they don't have to take the time to cash checks.  You cannot purchase your groceries without cash or a debit card.

Aldi's carries many regular items and then some seasonal items which often includes brand name foods (including some Trader Joe stuff!) as well as toys or gadgets (just like your local grocery store would.)  Often these seasonal items are pretty good buys.  If I see something I like, I usually wait a few weeks and they will start knocking down the price to get rid of whatever they have left to make room for the new stuff.  I have bought nice pajamas for Ky for $2, soccer balls for $2 and inflatable pools with built in sprinklers for $3.  Besides seasonal items, Aldi's will often clearance foods that are getting close to expiration.  I have bought ground turkey for $0.29/lb (I bought 10 lb and then just froze it all!) and whole wheat bread for $0.15 a loaf (bought 8 loaves and froze it all!).  Mondays & Tuesdays are usually the key days of the week to look for clearance items.  (At least that is my experience with the Aldi on E. Wash in Madison.) 

As far as pricing, Aldi's produce prices vary often just like other grocery stores. With that said, I almost ALWAYS buy my produce at Aldi's.

Here are some example produce prices at Aldi's and how I have seen them vary

1lb baby carrots $0.99---About every 6 weeks they go on sale for $0.49--this is when I stock up to last me 3 weeks.

Apples $1.99 to $2.99 for 3 lb

BIG seedless Watermelon $1.99 to $3.99

Cantaloupe $0.99 to $2.29 each

Onions $0.99 for 3 lb

Broccoli $0.99 - $1.49 lb

Bananas are ALWAYS $0.39 lb (this is the best price I ever see them!)

Avocados $0.49 - $0.99 each

Oranges 3lb for $1.49 - $2.99

Grapes $0.79 - $1.29

Anyway--usually some fruits and vegetables are at their rock bottom price and that is what I stock up on. 

Here are some other great deals at Aldi's.

You will always find Aldi's milk either the same price or lower than any other grocery store (and usually eggs too!)

Crackers--most boxes are around $1.  Graham crackers are $1.25--I have not been able to find Graham crackers under $2.50 anywhere else! (even with a coupon)

Flour is usually around $1.19 for 5 lb--this is a good price--it will bottom out at $0.99

Rice is $1.49 for a 3 lb bag

Salt for your water softener!  $3.49 for a 40 lb bag (I think it is 40...)

Chocolate chips $1.69

Margarine $0.59 for 1 lb

Yogurt--big containers are $1.59 for plain or vanilla

REAL vanilla  $1.99

Tortilla chips $0.99

Flour Tortillas $0.99

Other good deals include canned veggies or beans for around $0.40 a can, brown/powdered sugar around $0.99 for 2 lb and white sugar is usually around $2.50 for a 5 lb bag.

I shop at Aldi's about once every 2 weeks.  Prior to couponing--this was the main store I shopped at.  I honestly love this store and I don't think there will ever be a time that I don't shop at Aldi's.  I hope you found this blog helpful.  What are your favorite items at Aldi's?

Wednesday, September 29, 2010

Shopping for Halloween Costumes


I have had a couple people ask me about how to save money on Halloween Costumes.  So here is what I have...

Ask friends/family if they have costumes that you can borrow--or swap with them costumes from last year (if sizes are appropriate).  That being said, I have a 12 month Lion (I think it is a lion costume) if someone would like to use it--let me know.

Garage Sale-- During the summer there are tons of garage saled costumes.  These are fun to buy just so the kids can play dress-up, but then you can also double the use as using them for Halloween.

Saver's --Go to the back racks (by the men's clothes).  I was there last week--they  had TONS of second hand costumes starting at $2.99!!!  Infant to Adult sizes.  In other words--thrift stores are great places to look.

Make your own-- This is what we attempt to do every year.  (Though honestly after seeing Saver's prices, I am SO tempted to ditch the work for the easy cheap costume.)  You will find that you have a lot of stuff around your house already to complete your outfit.  Last year Ky was Bob The Builder--which included putting him in overalls, making him a toollbelt out of a nail apron I had (I also used his play tools), and putting a fireman's hat on his head which I placed a Bob The Builder sticker over the fireman logo.  Cost for this costume $1--for the hat.

Last year Alaina was a pumpkin.  I simply put her in an orange sleeper and cut leaves out of felt which I put her pony tail through.  Cost $0.27 for the felt.

What do you do to save money on Halloween costumes?


Tuesday, September 21, 2010

My Rock Bottom Price List

What are Rock Bottom Prices? My Rock Bottom Prices are the lowest prices that I see grocery items. When I find an item at “Rock Bottom Price”, I will stock up on that item until the next sale time (usually 6 – 8 weeks out). I have found that I have cut my grocery bill by about $30/week by doing this (often more!). This may not sound like much money to you—but I was a frugal shopper before I started shopping like this. I now spend no more than $50/week for a family of four and there are many weeks I will spend $20 or less (since I am relying on what I stocked.) Also realize that my “grocery bill” includes many of those personal necessities—shampoo, soap, batteries, toilet paper, etc…)


Jessica's Rock Bottom List:  Buy at these prices (or less if you find them!)

Shampoo/Conditioner: Free ( just pay tax)

Soap/Body Wash: Free ( just pay tax)

Kid/Baby Shampoo: $1 or less

Lotion: $1 or less (last 4 bottles have been free!)

Pads: Free (just pay tax)

Tampons: Free (just pay tax)

Floss: Free ( just pay tax)

Toothpaste: Free (just pay tax)

Deodorant: Free (just pay tax)

Diapers: $4.00 for jumbo size (many times I will score name brand diapers for $3)

Toilet Paper: $4.00 for 12 double rolls

Cereal: Less $0.50 a box (often free)

Crackers: $1.00

Pasta: Free

Pasta Sauce: $1/jar

Canned Veggies 0.40 can

Frozen Veggies: less than $1 for 16 oz

Frozen Pizza: $2 for a fancy pizza (Digiornos, Tombstone, Freschetta) Though lately I have been getting for $1 or less

Bread: $0.75 for whole wheat

Cheese: $1.00 for 8 oz

Yogurt: $1.50 for 32 oz

Peanut Butter: $1.00 for 15 oz.

Vinegar: 1 gallon $1.99

Apples : 0.99/lb

Oranges : 0.50/lb

Cantaloupe: $1.00 each

Pineapple: $1.00 each

Bananas: 0.39 lb

Carrots (baby, peeled): $1.00/lb Aldi’s has them 0.49/lb every 1-2 months and I stock up then! Though it doesn’t last until the next sale

Flour: $0.99 5lb bag

Sugar : $2.00 5 lb bag

Brown Sugar: $0.99 2 lb bag

Powder Sugaqr: $0.99 2 lb bag

Fruit Snacks: $1.00

Rice: 0.50/lb

Chicken boneless breasts frozen: $4.00 3 lb bag

Chicken boneless breasts fresh (no hormones): $1.99 lb

Frozen ground beef: $5 for 3lb

Fresh ground beef $1.99 or less per lb

Pork ribs/loin/roast: $1.79 / lb

Ice Cream $1.50 / 0.5 gallon


Are there any items that aren’t on here that you are curious about? Do you have any items to add to the Rock Bottom List?  Let me know!

Wednesday, September 15, 2010

Being Green with plastic bags

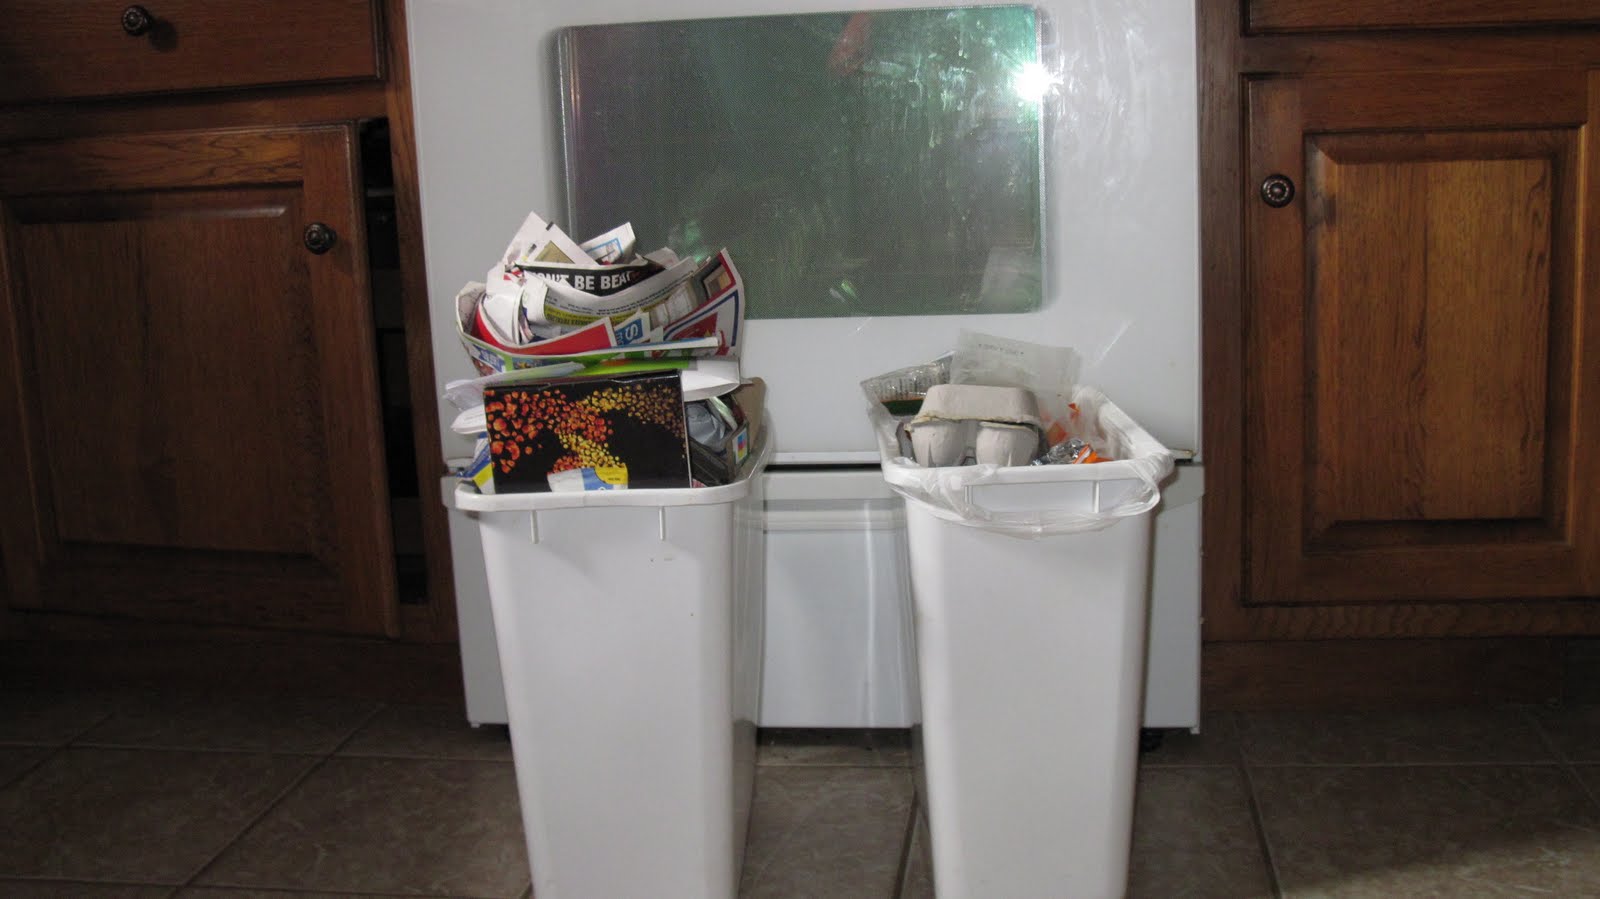
Paper Recycling bin & kitchen trash (right) with one week of accumulation


Recycling & trash cans in front of my oven (to show you how big my cans are)

A Target bag is my trash bag!  Thank you TARGET!
When possible I use reusable bags.  However, in today's age, I still end up with a plethora of plastic bags.  I know they are bad for the environment, however, I always make sure to reuse my plastic bags. 

My number one way of reusing plastic bags is as garbage can liners.  In fact, I have not bought a garbage bag in years.  I have small trash cans in all rooms and I am able to recycle, compost, and reuse so much that we actually have very little trash.  Not only do I use plastic bags as liners, but I also use packaging.  For example, disposable diapers come in plastic wrapping that perfectly lines my upstairs bathroom trashcan.  I also buy toilet paper in 12 -24 roll packages and I reuse their packaging as liners as well.  The key is to make sure you open the packaging at the narrow end so you create a bag.

I know some people have a lot more waste and do not see a plastic bag working as their liner--but I challenge you to try it.  What's the worse that could happen?--perhaps you have to take the garbage out more than once as week!  (Hey that's probably a good thing!)  I also love using small wastebaskets.  I find it leaves so much more room and I can easily tuck the garbage in a cabinet or the bottom of the pantry.  I also do not have to worry about pets or babies getting into it. 

So what else can we do with plastic bags.  Of course they are great at toting things to and from, but they also can do the following:

Pick up animal poo--eww!
Thaw out meat (keep meat in the packaging and then place in plastic bag--it will help keep that juicy mess contained)
Donate to your local library (they use them for checked out materials on rainy days to keep them dry)
Donate to your grocery store (some recycle, some reuse)
Reuse at the grocery store in place of your reusable bag
Use as packing material when packing delicate items
Save for your garage sale (your customers will need them!)
Keep a few in the car to collect that random garbage (You can hide it under the seat or loop the handle over the headrest so it is easy to toss things when in the backseat, these also make a quick alternative barf bag)
Use them for dirty diapers (or dirty clothes bag) when traveling (cloth or disposable)
Cover your shoes in plastic bags if you are going to be in the mud and want to protect them (think gardening)
Litter box liner
Use bags to organize (separate projects such as sewing or knitting projects0
Cover your plants to protect from frost
Use as a smock for kids (cut head hole, arm holes and then slit down the back side from head hole down, the slit goes on the child's back)
Store wet paintbrushes overnight
Lunch bag
Some people make rugs or purses out of them (No KIDDING!)
Use to contain your liquids when traveling and protect from spillage (shampoo, conditioner, etc...)
Use when traveling to separate dirty clothes from clean clothes

What are your ideas for reusing plastic bags?

Tuesday, August 31, 2010

Being Green with Reusable Bags

I don't want to preach to the choir--you all know about how wonderful Reusable Bags are--but I am going to challenge you a little further. 

I have around 15 reusable bags and I have spent no more than $0.50 on all of them.  Some I have received for free from stores and friends.  My main supply of reusable bags actually came from Menard's.  Periodically, Mendards will have their bags on sale for $1.00 each and then offer a $1.00 rebate for up to 10.  This is how I got all of my reusable bags for free--(the $0.50 I paid is for the rebate envelope & stamp.)  How cool is that?!  I have since used these bags many times and have actually MADE money off of them.  AND--if you are a Menard's shopper they will occassionally have sales for 15% off anything you can fit in their reusable bag (even Sale priced items!)

Did you know that at many stores they will actually give you a discount for each bag that you bring in?  Here are stores that I know of in the Madison area that will give you a $0.05 discount per bag that you use/bring in.

Target
HyVee
Willy St. Co-op (Thanks Kristen!)
Sentry (gives a $0.02 discount)
Copp's
Aldi's--they don't give a discount, but if you don't bring your own you may have to purchase one of their bags or find a box to put your groceries in.  (This is also how Aldi's is able to keep their prices so low.) 

Of course, if you are the creative type, you could always make your own reusable bag out of a t-shirt or towel.  (And what a WONDERFUL way to package a Christmas gift and ADD to your present!) Check out this site if you want to get your "crafty" on!

http://tipnut.com/35-reusable-grocery-bags-totes-free-patterns/


Do you know of any other stores that discount for reusable bags?  Let me know so I can add it to the list.

Stay tuned to "what you can do with those disposable bags!"

Monday, August 23, 2010

Being Green with Mismatched Socks

Here’s what we did with our mismatched socks today…


First I pulled out 6. Two for Ky, Alaina, & me.


Then I let my kids pick out their socks. (It’s always more fun that way!)


Then we filled a dishpan with water and soap (don’t use those chemical cleaners for this!) and of course STUCK our feet in!

We then washed the floor.  (By the way, if you are preggo--this will make washing the floors less of a "back-ache.")  So you don't slip, I recommend buying some puffy paint from your local Walmart/Joanne's/Michael's.  It costs around $1.  Then you can paint some grid marks on the bottom of the socks so you have some traction.--please wait for the paint to dry before washing.  We don't use the puffy paint--and just "risk it!"--the kids usually laugh if they fall.

Ky glided beautifully across the main part. I worked on all the corners and sides. And Alaina…well, she just stood in the dishpan.


It was a great time. We accomplished 2 things—washing the floors and keeping the kids entertained (by making them work!—Shhh! Don’t tell them!)

Afterwards, there was a fair amount of water on the floor which I cleaned up with some old t-shirts and towels and then I put a fan on the area. We all had fun.  Oh and Ky buffed the floor with his butt--see how shiny it is??


So those, mismatched (or even holey) socks can have a second life! (They are also quite handy for dusting.  Put one on your hand and use water or your favorite dusting solution.  I love using socks to dust the top of window sills.)

And OF COURSE…you can always make sock puppets!

Here is a fun website for crafting with socks.

http://familycrafts.about.com/od/sockcrafts/Sock_Crafts.htm

and this one is good too!

http://www.thriftyfun.com/tf25486520.tip.html

What do you do with your mismatched socks??

Monday, August 9, 2010

Being Green with Toilet Paper: Let's get to the bottom of it!

I was amazed by how quickly my family was going through toilet paper--and honestly, I think it all happened once my little boy was potty trained.  I knew there had to be a better way for me to invest (at a proper price) in toilet paper--(This sounds a bit ridiculous...I know), as well as teach or restrain my family from using too much.  Here are some tips on helping that roll last a little longer...

* When putting a new roll of toilet paper on, pinch the toilet paper so the roll is now oval instead of circular.  The toilet paper will then roll out slower helping little ones use a little less (as well as big ones--I have noticed the hubby uses a little less when I do this as well! :)

*Teach your child to use a certain number of squares.  Our magic number is "no more than four"  (and I try to encourage three).   You can also make this a fun game, by having them count out the squares as they pull the roll.    Here's a fun little rhyme. 

              One, Two--that won't do,
              Three, four, DON'T PULL MORE! 

*Fold, don't bunch the toilet paper.  You get more surface area, therefore use less toilet paper.  You can show your kids how to fold on the squares and then in half to help them. 

*Buy single ply 1000 sheet toilet paper for the kid bathrooms (or your own if you like).  Okay--yes NOBODY likes 1-ply, but have you ever actually purchased one of these rolls and put it in your house?  THEY LAST FOREVER!  Seriously...I experimented with this and put a roll in and it lasted OVER 2 weeks!  And we usually go through a double roll of 2-ply in 2 days!   If your kids aren't counting squares (or even if they are) you will be amazed by how long these rolls last.  These rolls go on sale at least once a month at Walgreen's for $0.50 each, or I will find them at my local grocery store occassionally for $0.40 each--this is my stock up price on these.  (And yes, in my house, these rolls are for the children!)

*Finally--Stock up on toilet paper when the price is right.  My buy price for 2 ply 12 Double rolls is $4.00.  I watch for when my grocery store has a sale and then match it with a coupon.  I will buy as much as I can whenever I can get this price, knowing--we will ALWAYS need toilet paper.  And then when you don't see a sale for a while, you have plenty stocked up. 

How do you save on Toilet Paper?  Please share any tips & tricsk!

Thursday, August 5, 2010

Refinancing your home - 3.875% for 15 year loan!

My husband recently discovered that 15 year interest rates are at an all time low at 3.875%.  My husband, Mr. Numbers Guy, has already calculated that if we refinance from our current 30 year loan (at 4.75%) to the current 15 year rate, we will actually only need to pay $100 extra a month on our mortgage.  (This $100, I can happily say, we can do since we are now saving so much money on groceries! Yeah us!) What an awesome opportunity!


AND this also means that 65% of our payment will go to the principal now as opposed to the current 40% !  I am so excited to think that we could have our house paid for in 15 years.  We don't plan to stay her for more than 5 years, but still to walk away with that much more when we sell--how exciting!
 
If you are currently in a 30 year loan you may want to look at your options of refinancing.  My husband found that Summit Credit Union has the cheapest closing costs of $1100 and it could be less if you get the appraisal waved--they also are currently at 3.875%.

If you are interested in finding out what sort of change in payments you would have if you moved from your current loan to the 15 year loan, call Summit, or your bank.  They will be happy to crunch the numbers for you.  (After all they sell these loans for a living.) 

Along with Rob's number crunches, we also always look at how quickly would we make back the closing costs (this is important to us, since this is extra money coming out of our pockets.)  This may be something you would want to look at too.  We found out that within a year we would more than make up that $1100 closing cost!  This definitely makes it worth while.

You probably don't want to wait too long to do this, as interest rates may go back up soon (then again they could keep going down...).  

So what options did you find in refinancing your home?  Any advice?

Monday, August 2, 2010

Being Green with Hand Soap


We are FREQUENT hand washers in my family and we used to go through soap so fast, until now.

(The short story)

If you are looking to save money on liquid hand soap, invest in a soap dispenser with a "foaming nozzle." (really it's just a fancy aerator...but that's another story...) Then when the dispenser is empty, refill half of it with normal liquid soap and the other half with water. And then watch your soap usage get cut in half OR MORE! (I personally have seen our usage drop by 75%!)


(The Long Story)
It is interesting how most soap pumps are made.  They actually dispense way more soap than you need.  You don't need that much to get a nice lather.  I had adjusted my own personal dispense uses to be accurate, however when it came to my son--he was "no holds bar!"  In fact, I would find soap all down the side of the sink and the counter.  He used WAY too much.  Not to mention, he would struggle getting a nice lather with his little hands.  Then one day he broke our nice soap dispenser, so off to the store I went. 
I planned to get a cheap dispenser, since I didn't want another broken one and settled on a Dial "foaming" soap dispenser.  This WAS the solution!  The soap use was less, he didn't have to work so hard to lather, and I didn't find soap all over my sink.   It was wonderful.  That is until we ran out.  No way was I going to spend $1.75 on another dispenser or $4 + on refill soap!  That's insane!  (and of course the bottle says "only refill with Dial foaming soap".) 

Well, I am a girl to break all the rules and so I did.  I took my normal liquid hand soap and filled the dispenser half way up with soap and the other half with water.  Put the nozzle on, shook, and VOILA!--Foaming soap.  And I only used half of my normal soap!  These companies are trying to get you to pay more for water!  (Look at the ingredients!  They are pretty smart!)  But I figured them out and now you have too!

Friday, July 30, 2010

Being Green with Laundry Detergent

Do you have a water softener? Then this article is for you! This is a little something I learned from the “Culligan Man”.

Did you know you only need about 1 Tablespoon of detergent for a large load of laundry when you have a water softener? When you use a water softener, many of the hard minerals are removed from your water allowing for the soap to work better. In fact, if you use too much detergent, your clothes may actually get soap buildup! Most detergents come with a measuring scoop or cap. The measurements that the product gives you is based on HARD water. However, many people (especially those in the Madison area), have a softener and don’t need that amount of detergent. How do you determine how much detergent you actually need? Start with one tablespoon and run a load. See how your clothes turn out. If they don’t smell clean or still appear dingy, try again with a little more. Figure out what works with your water and machine. This experiment will save you money in the end.

Then after you figure out how much detergent to use for your washing machine—go do it with your dishwasher! You will be shocked on how changing the amount of detergent will save you money and still get your clothes and dishes clean! (Your detergents should last you at least 3X longer!)

(I have not tried this out with the new “ultra” detergents, so I am unsure what the detergent amounts would be with these.)

So, what did you find when you "Tested" your detergent?